
Installing PHP on Windows 11 can seem troublesome, especially if you’re new to programming or web development. However, with the right guidance, you can set up the latest version of PHP quickly and easily. In this article, we’ll walk you through the steps of installing PHP 8.4.3 on Windows 11 and running your first PHP program. Let’s dive in!
Why Install PHP?
PHP (Hypertext Preprocessor) is a popular server-side scripting language widely used for web development. Its flexibility and ease of use make it suitable for developing dynamic web applications. The latest version, PHP 8.4.3, offers performance improvements and new features that enhance coding efficiency and security.
By installing PHP, you can:
- Create dynamic web pages.
- Connect to databases.
- Utilize various programming libraries and frameworks.
Read More: Installing Ubuntu 22.04 LTS on Windows 11 Using VirtualBox
Step-by-Step Guide to Install PHP 8.4.3 on Windows 11
Step 1: Download PHP
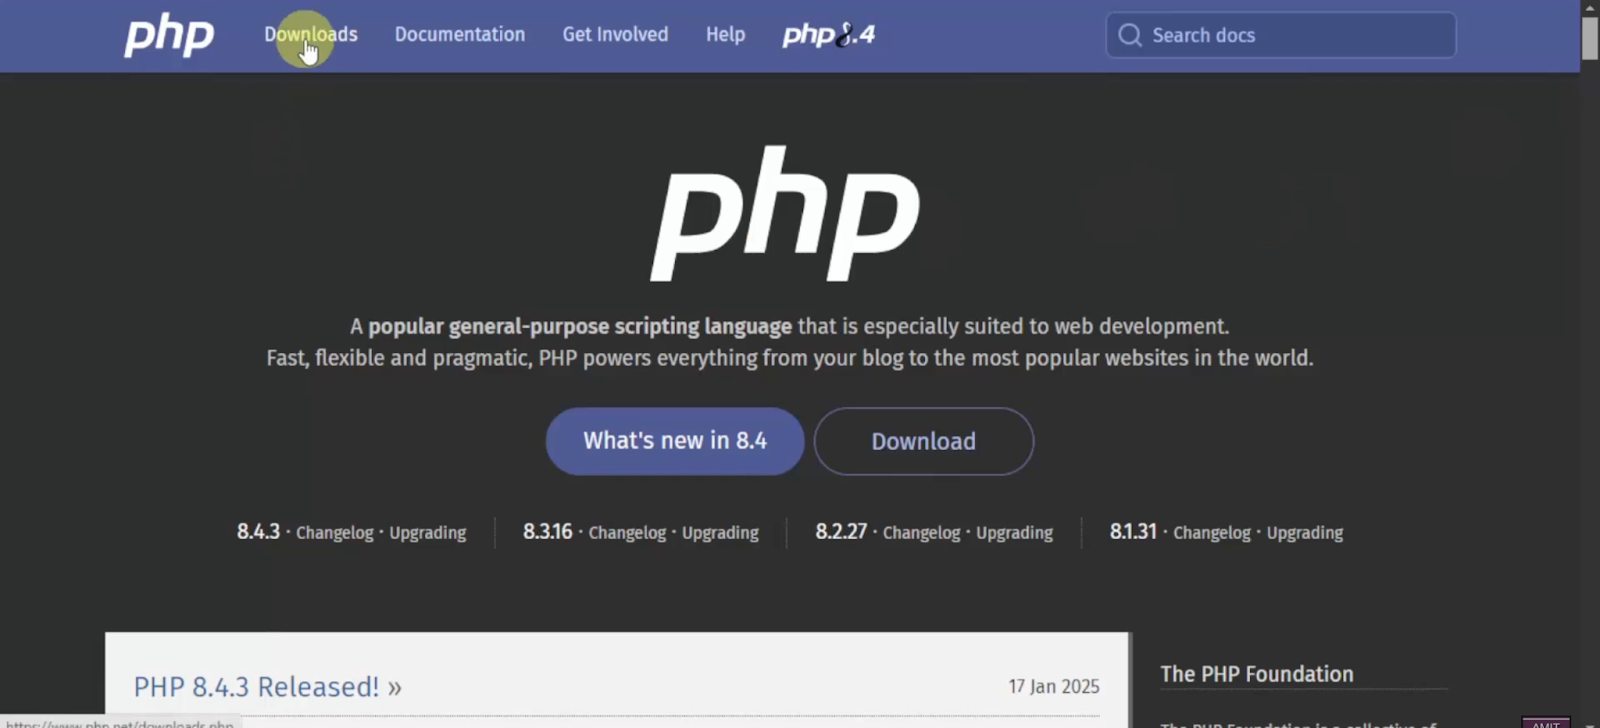
- Open your preferred web browser and search for “PHP” in your search engine. Navigate to the official PHP website.
- Once on the PHP homepage, click on the Downloads section.
- Locate the Windows Downloads option. Choose the link for the current version, which is 8.4.3 in this case.
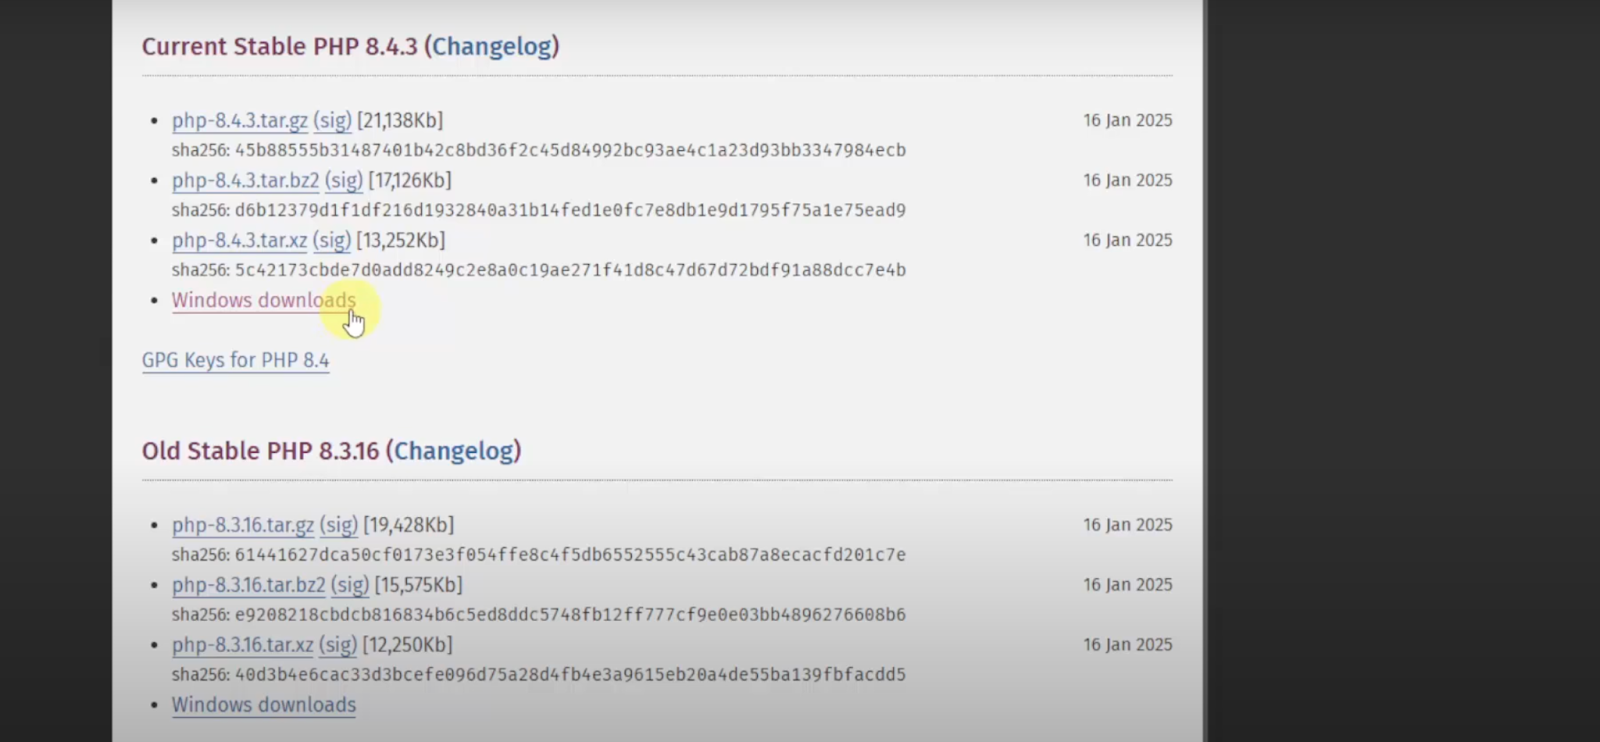
- You will see two versions available: Non-Thread Safe and Thread Safe. We recommend selecting the Thread Safe version. This version is suitable for use with web servers such as Apache and Nginx.
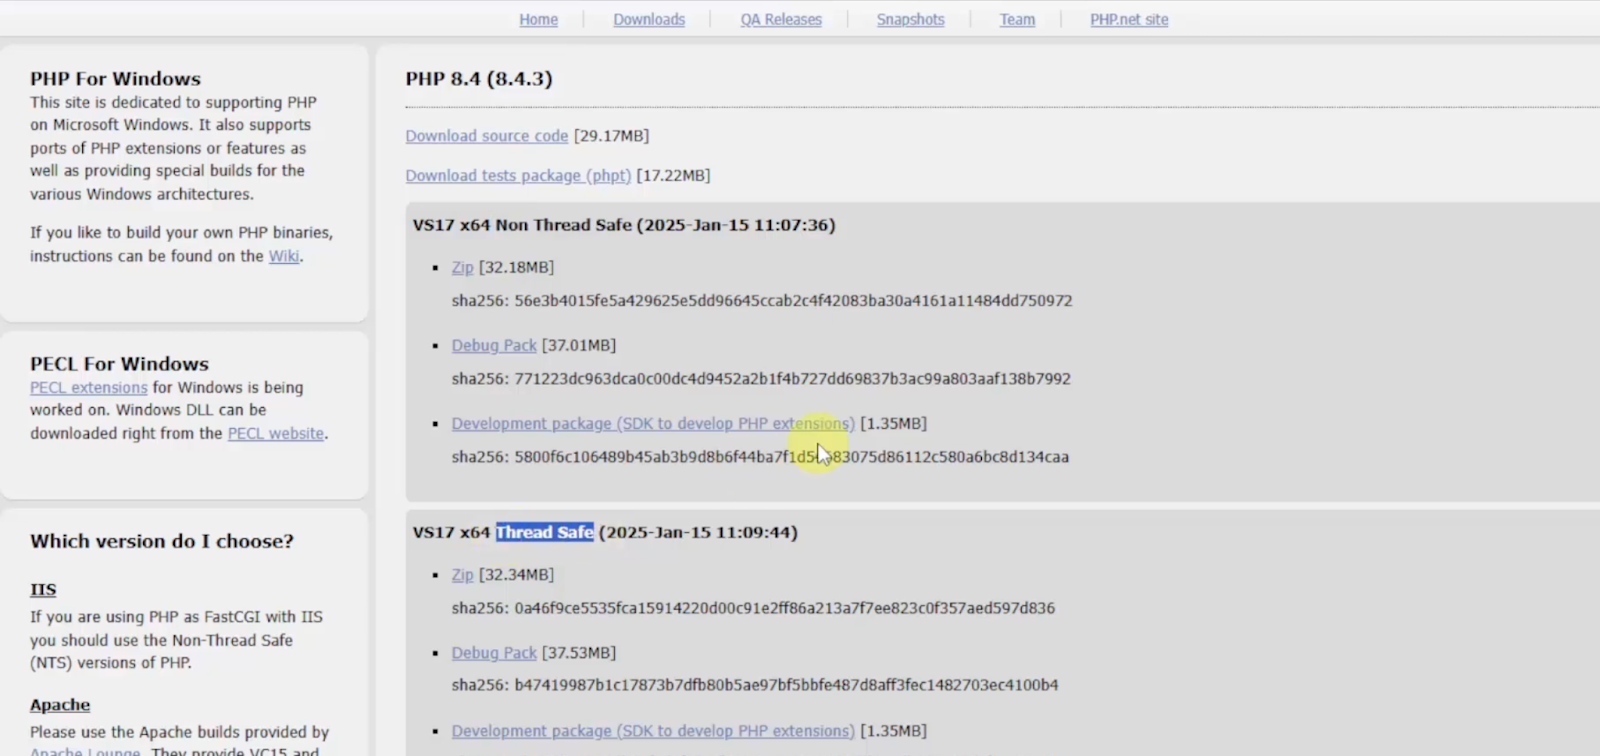
- Click on the appropriate zip file to start downloading.
Step 2: Extract the Downloaded File
- Once the download is complete, navigate to the folder where the zip file was saved.
- Right-click on the zip file, select Extract All and specify the folder name as PHP 8.4.3.
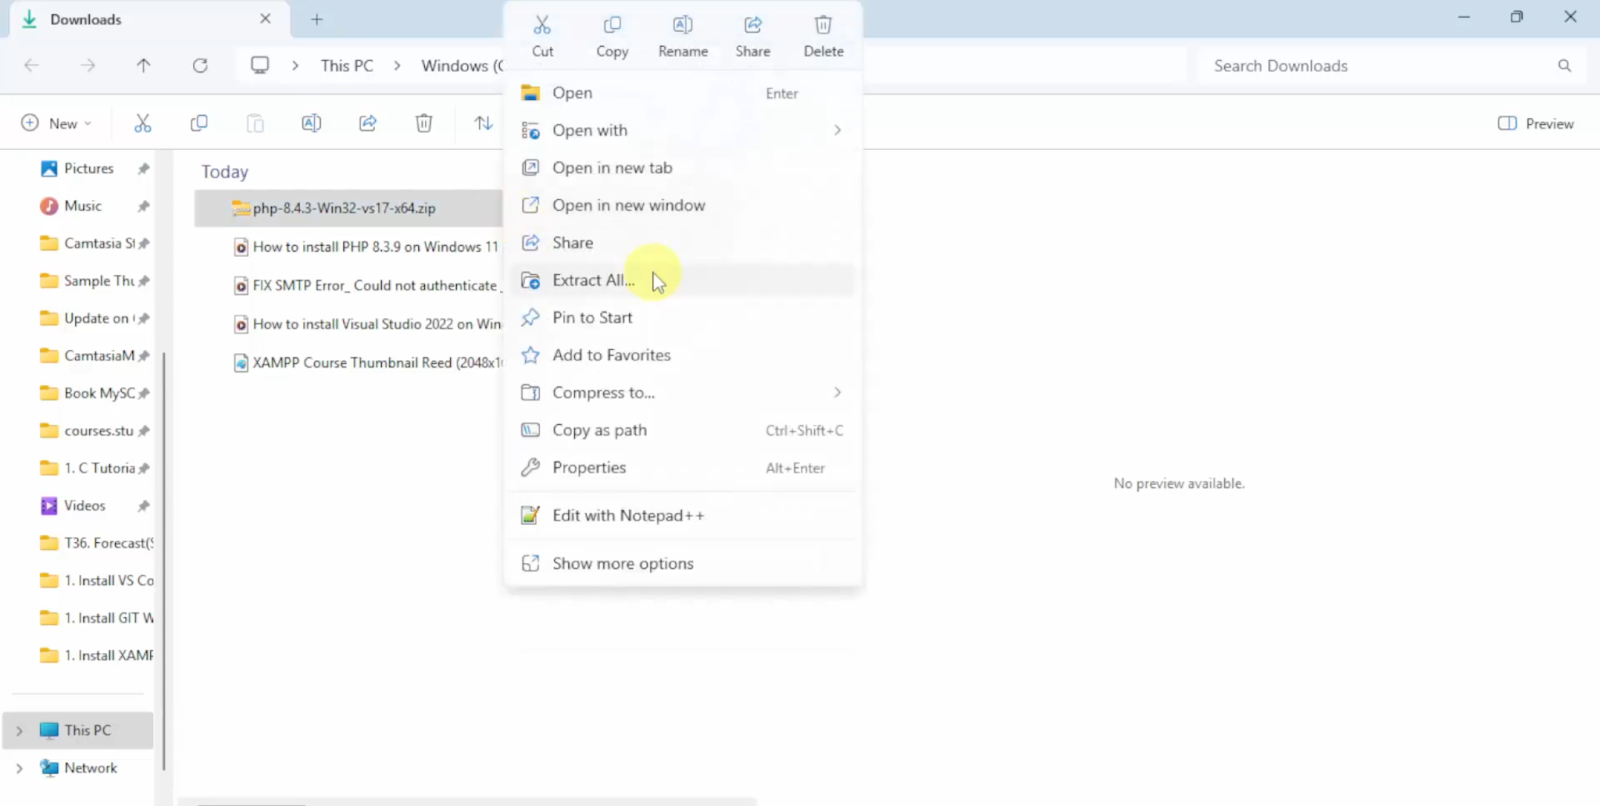
- Click Extract to unzip the files.
Step 3: Move PHP to Program Files
- After extracting, right-click on the PHP folder you just created and select Cut.
- Navigate to the C: drive and open the Program Files folder.
- Right-click in the directory and select Paste. You may need to click Continue to authorize this action.
Step 4: Set Up Environment Variables
To run PHP from the command line, you need to add it to your system’s environment variables:
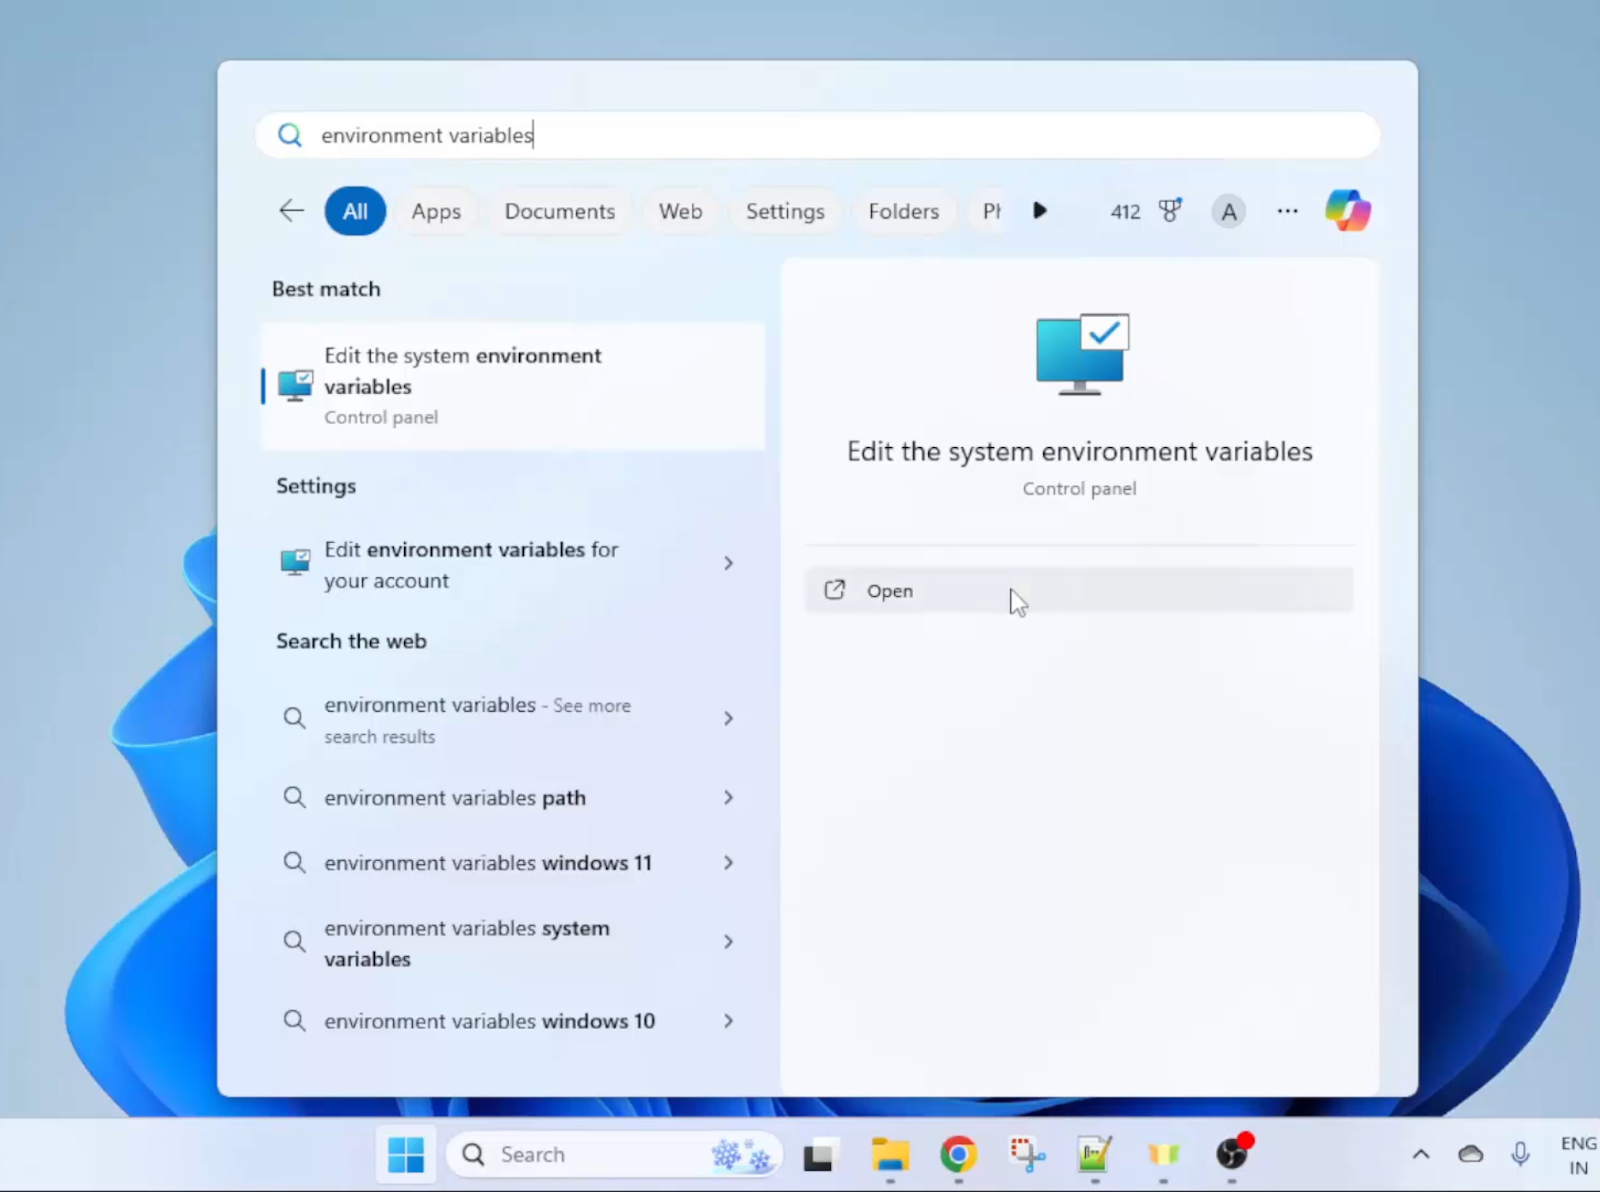
- Open the Start Menu and type “environment variables.” Click on Edit the system environment variables.
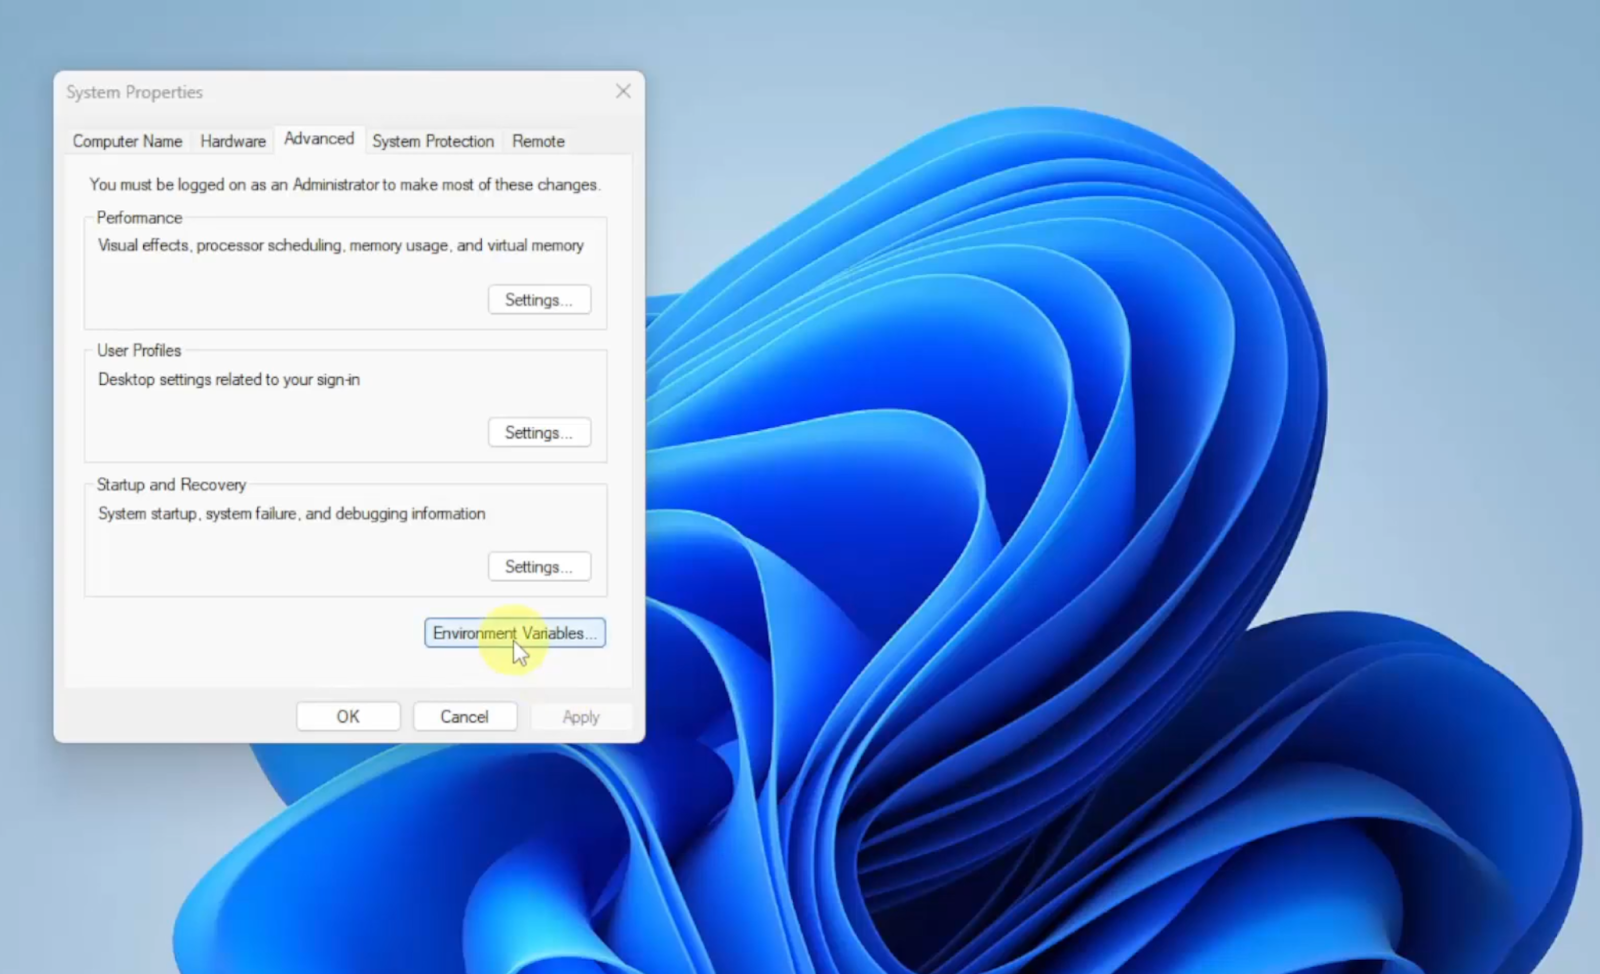
- In the System Properties window, click on the Advanced tab and then on Environment Variables.
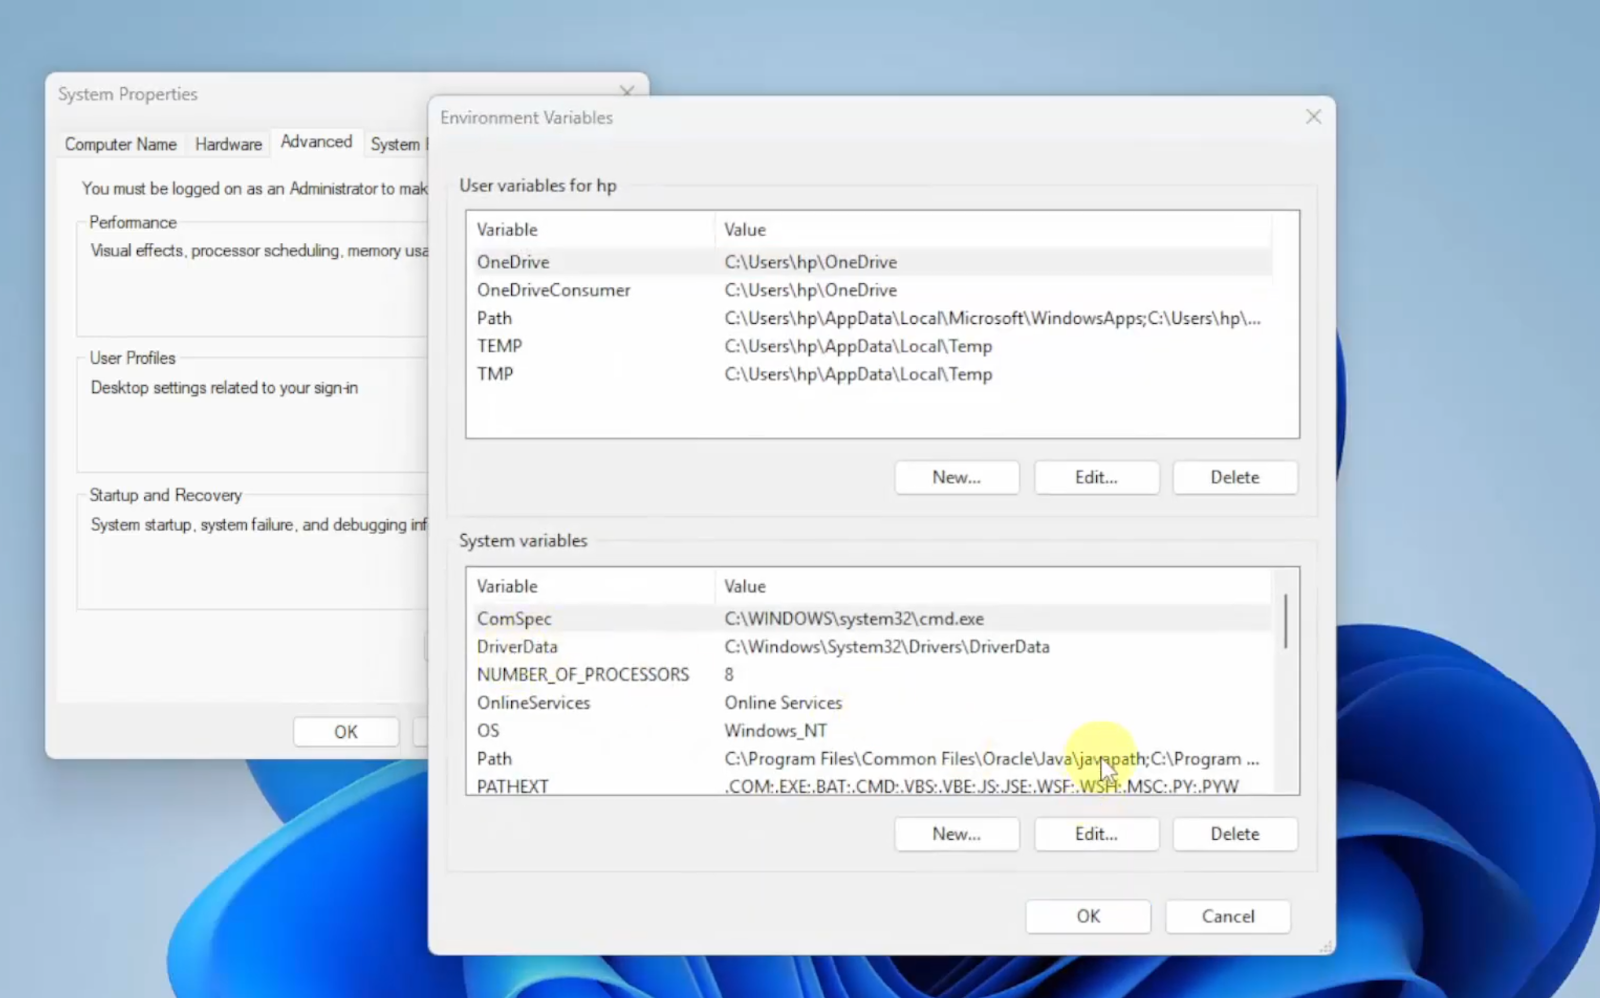
- Find the Path variable in the System variables section and select Edit.
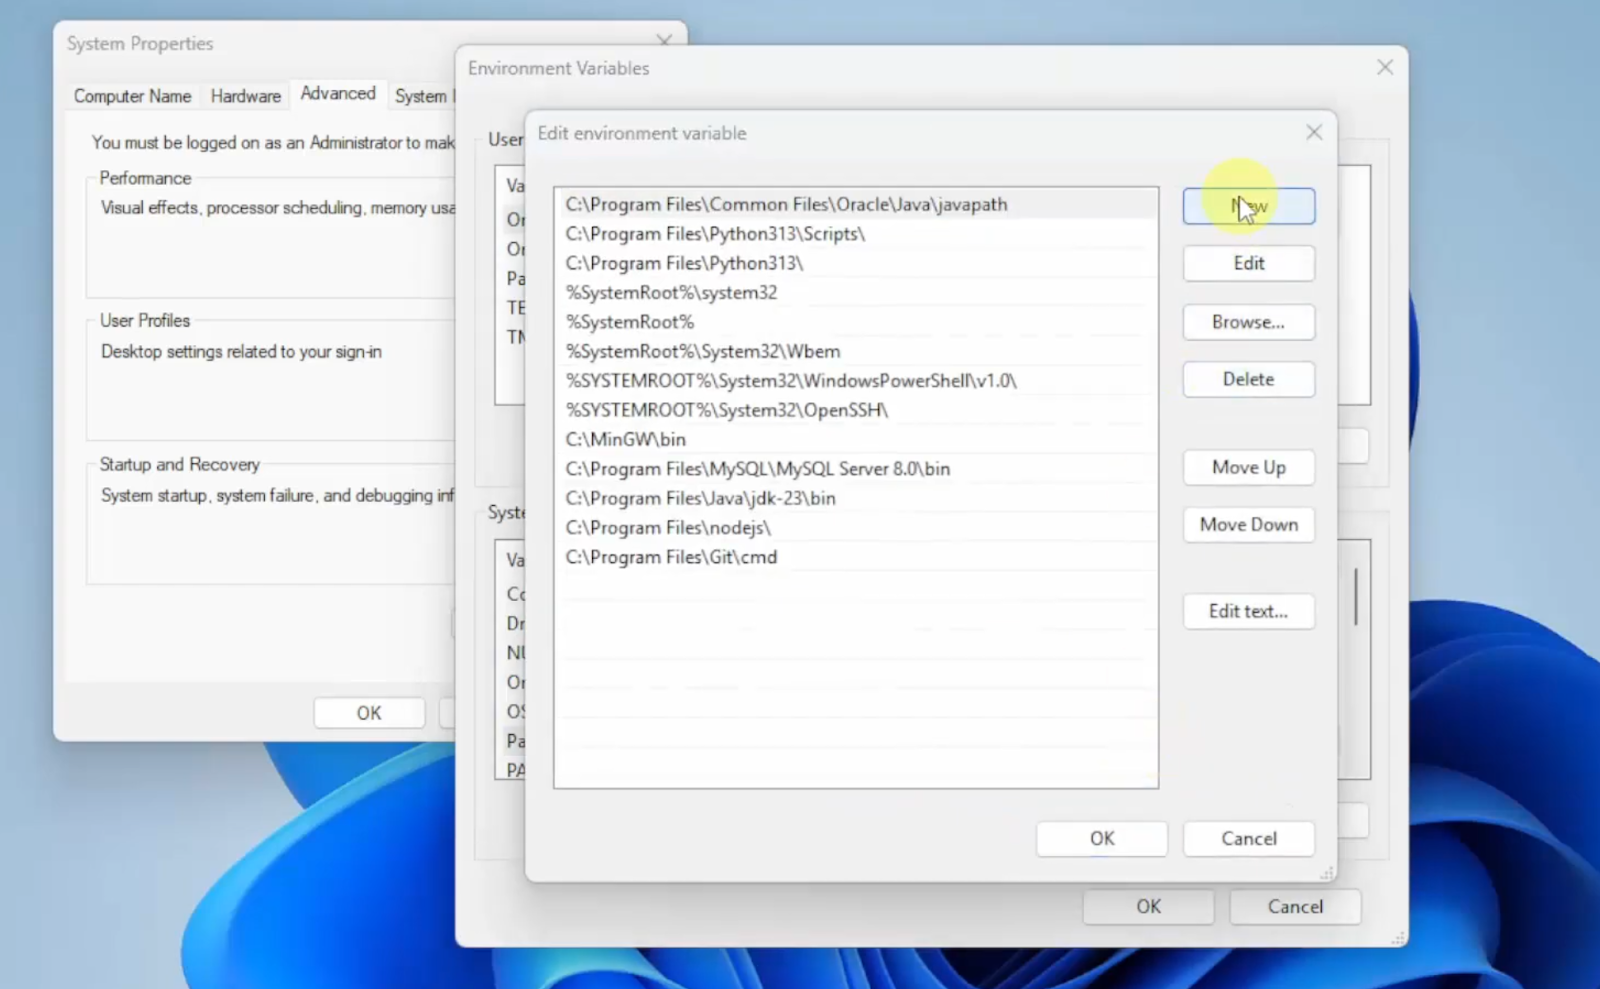
- Click on New and paste the path to your PHP installation (e.g., C:\Program Files\PHP 8.4.3).
- Click OK to save your changes.
Step 5: Verify the Installation
- Open the Command Prompt (you can search for “CMD” in the Start Menu).
- Type the following command and hit Enter:
PHP -- version - If PHP was installed correctly, you should see the version 8.4.3 displayed.
Step 6: Create Your First PHP Program
Now that PHP is successfully installed, let’s write your first PHP script:
- Go to any drive, for instance, the D: drive, and create a new folder.
- Inside this folder, right-click and create a new text document. Name it indnex.php.
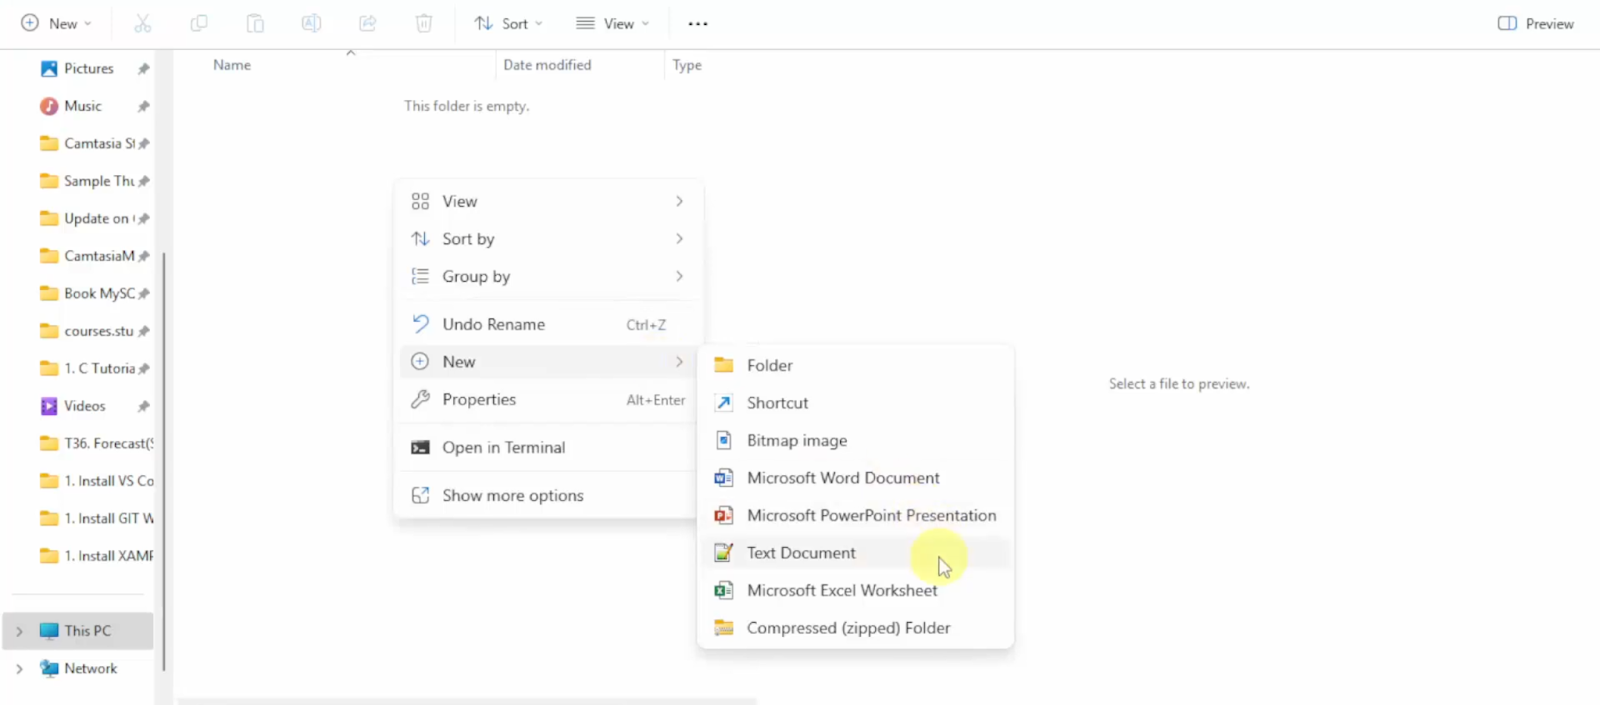
- Right-click on index.php and choose to open it with Notepad or Notepad++.
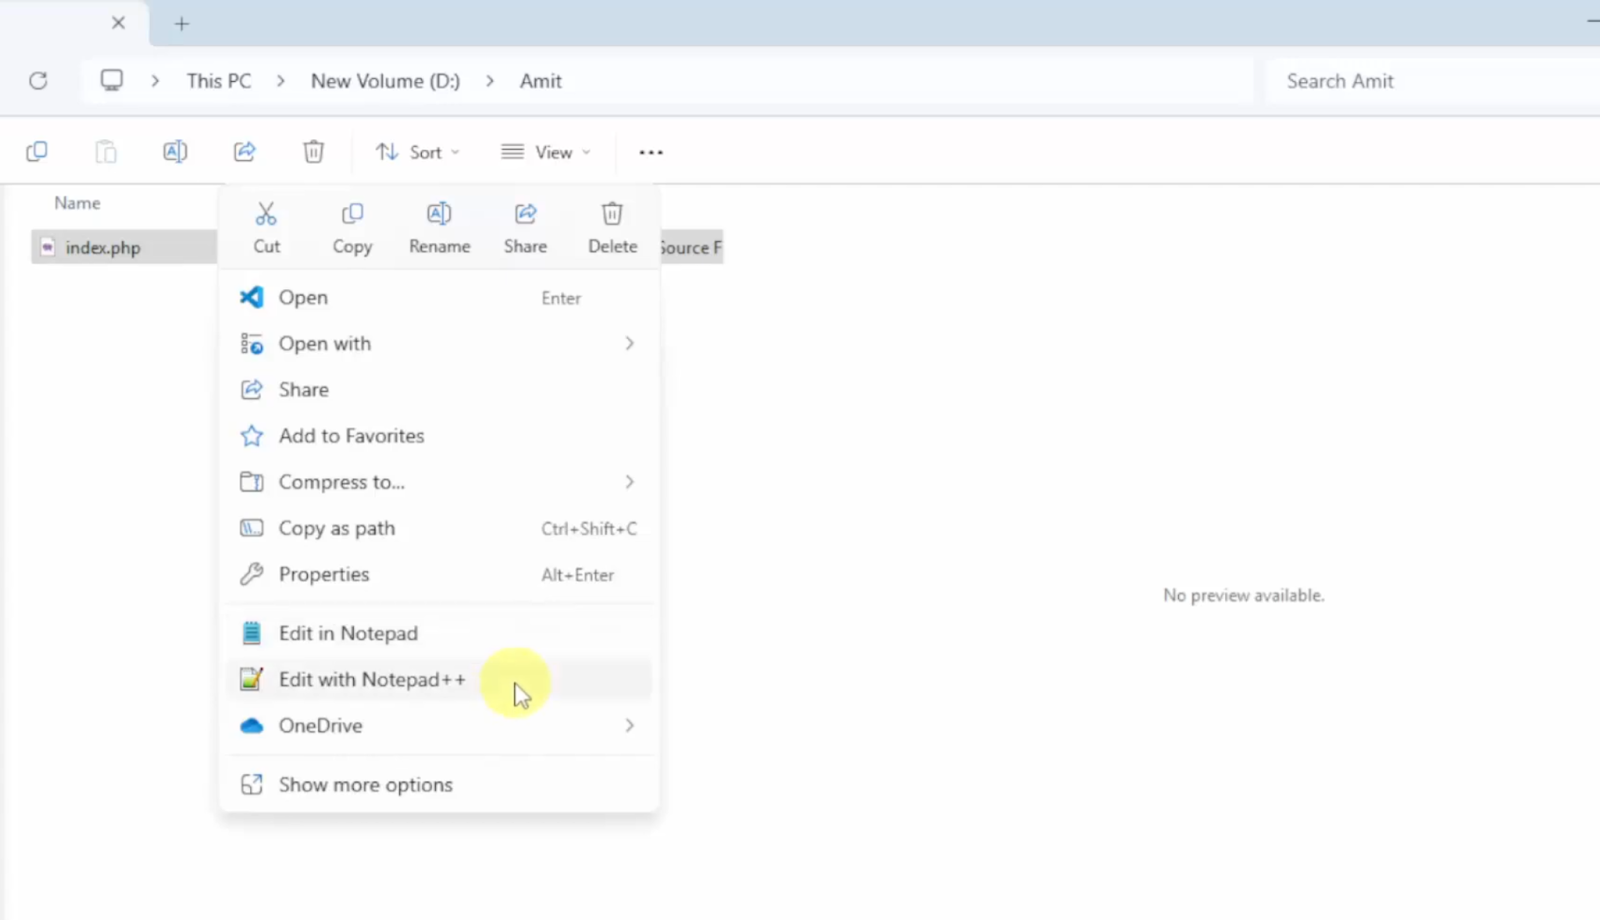
- Add the following code to your PHP file:
<?php
echo ‘Zarnab’;
?> - Save the file and close the editor.
Step 7: Run Your PHP Script
- Right-click and select “Open in terminal”
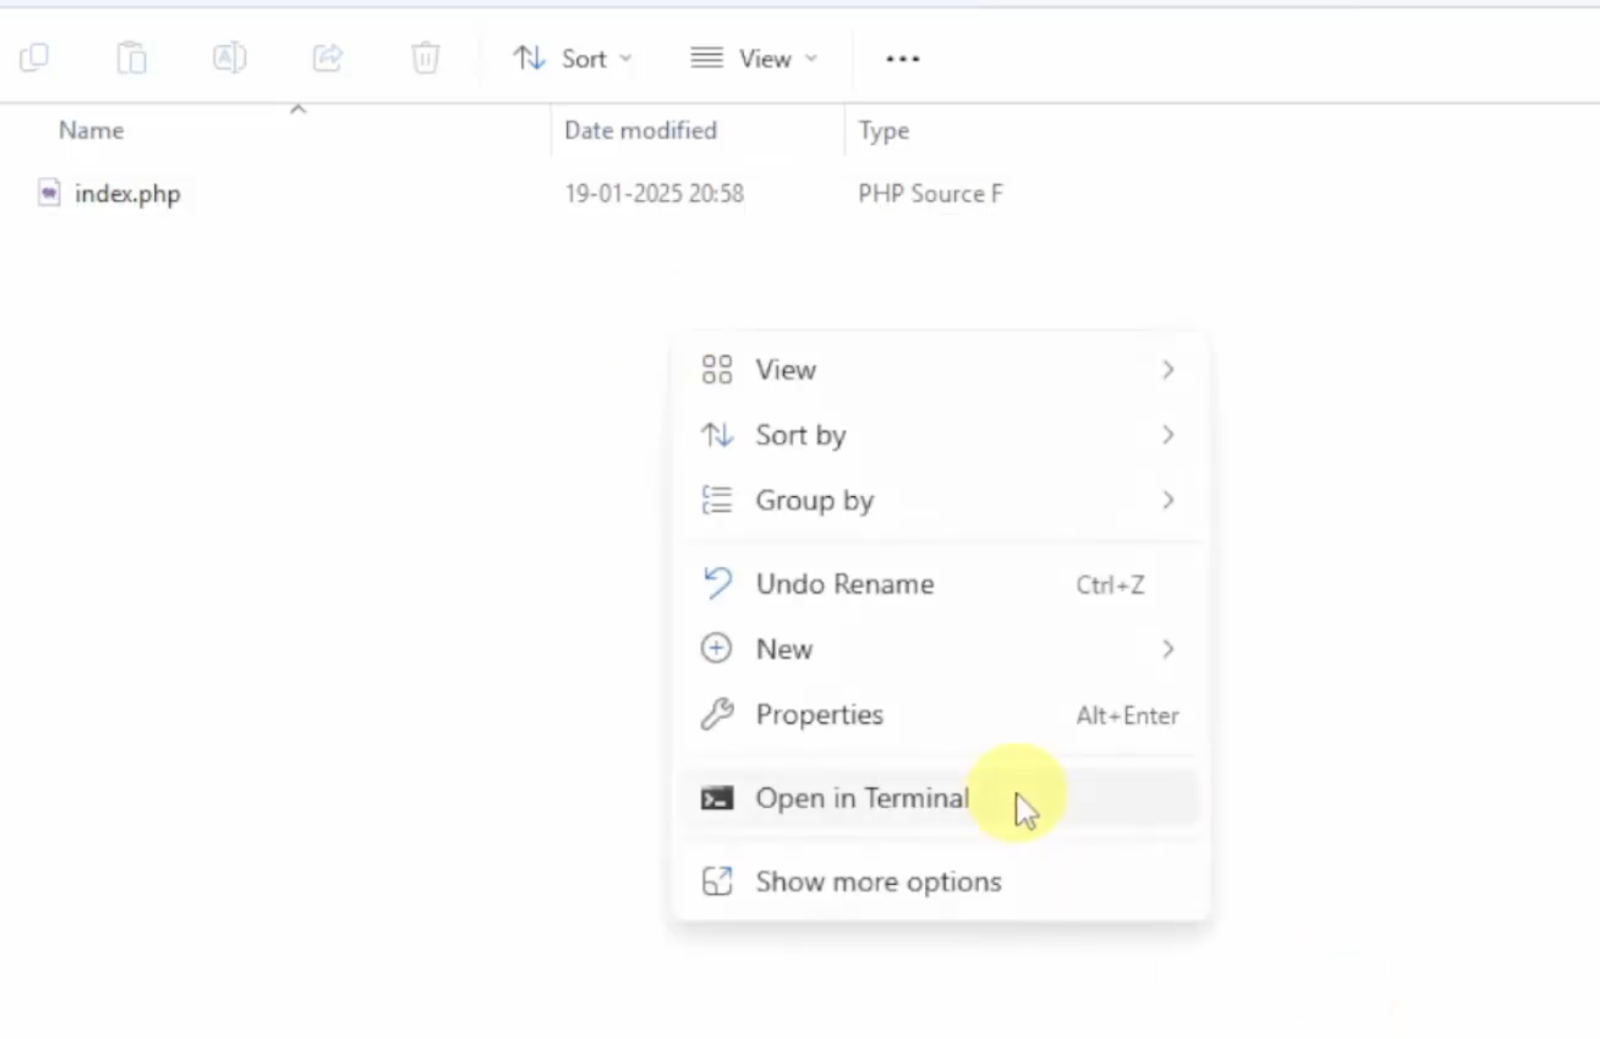
- When the terminal opens, type the following command and press enter.
PS D:\Zarnab> dir
Only file be visible index.php. Now to run it typephp index.php - If everything is set up correctly, you should see “Zarnab” printed in the terminal. Congratulations! You have just installed PHP and run your first program.
Also Read: How to Install VirtualBox on Windows 11
Conclusion
Successfully installing PHP 8.4.3 on Windows 11 provides a solid foundation for web development projects. By following the steps outlined in this guide, you can efficiently set up your development environment and leverage the performance enhancements and new features offered by this latest PHP version.


